 |
|
Forms summary |
|
|
|
|
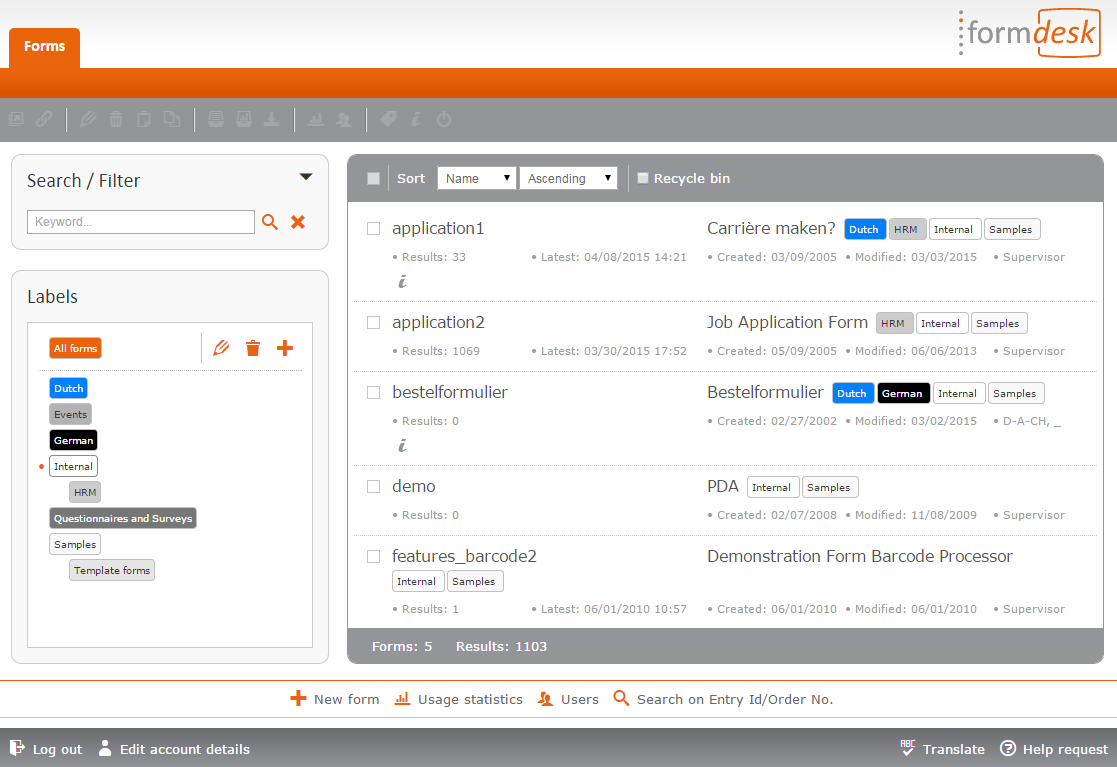
The forms summary is the landing page after you log in on your account. |
|
|
This document contains the following sections:
|
 |
|
|
The toolbar |
The buttons in the top grey bar refer to the selected form and include the same options as the menu activated with a rightclick on the form.
|
 |
 Open form… Open form…
Opens the form within a new window, even if the form is not active.
 Use form… Use form…
Opens a window with information on how to present your form.
 Modify form… Modify form…
To change the content, the layout or settings of a form.
 Delete form... Delete form...
Moves the form to the recycle bin.
 Copy form... Copy form...
Creates a copy of the form without result entries.
 View results… View results…
Opens the results overview where you will find all entries of a form. You can also click on ‘Results: #’ within the forms overview.
 Statistics result entries… Statistics result entries…
Provides a statistics summary of the entries on your form. View the manual.
 Download results… Download results…
Downloads the entries on your form in a specified format. View the manual.
 Usage statistics… Usage statistics…
Provides an actual and historical overview of the usage on the selected form.
 Labels… Labels…
Opens a new window for (un)linking labels to the selected form. See subject Categorise your forms using labels.
 Documentation… Documentation…
Provides the option to include information or instructions for the form. See subject Documenting.
 Deactivate form... Deactivate form...
Deactivates the form. A red indicator will be shown behind the form which indicates the form can no longer be filled in. Users of the form will see a standard notification informing them the form has been closed. You can also deactivate a form by modifying the form and on the Settings tab, within Checks & Validations set a response limit or an expiration date. You can choose to include a personal message. |
|
|
List of forms |
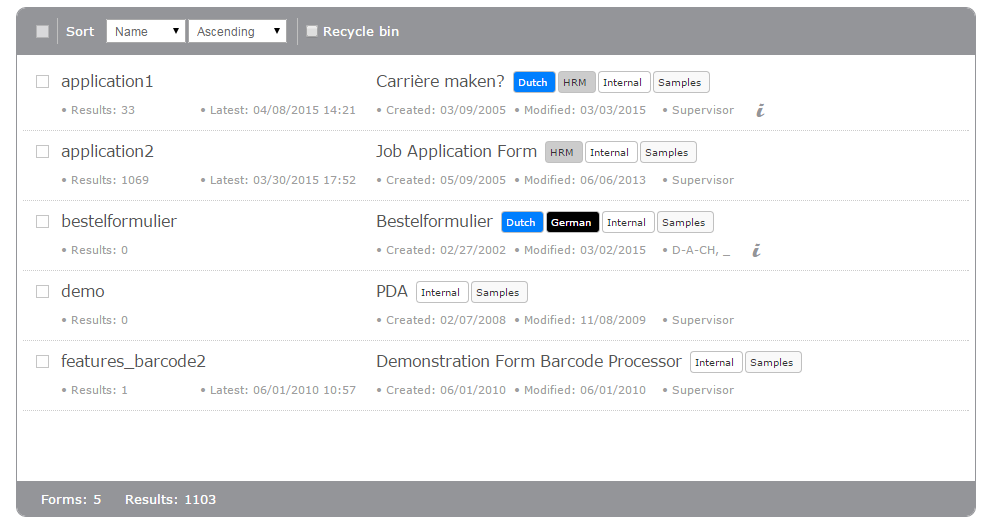
The list of forms is an overview of all forms.
|
 |
|
 Users are shown all forms for which they have been given any permission. Users are shown all forms for which they have been given any permission.
For each form the following parts are displayed:
A selection box:
Use this to select multiple forms. See the section below on Making selections.
The name:
The name is set on the Settings tab of the form. The name is part of the URL of the form.
The title:
If a title has been set for the form, then it will be shown next to the name of the form.
‘Results: <number of results>’:
Displays the total number of submitted forms. If a response limit has been set then the text will be colored orange when a minimum of 80% of the response limit has been reached and colored red if the response limit has been reached and the form is closed. By clicking on this link you enter the results summary.
‘Latest: <date>’:
Only shown when there are result entries. Indicates the last time a form has been filled in. By clicking on this link the last filled-in form will be shown.
‘Created: <date>’:
The date the form was created.
‘Modified: <date>’:
The date the form has been modified last. By clicking on this link you can modify the form.
The owner of the form:
Indicates the owner of the form. The supervisor and the owner of the form can click on this link after which the
user management window will open.
An orange or red indication dot:
- If an orange dot is shown behind the form, then the set limit (expiration date, response limit) has almost been reached.
- If a red dot is shown behind a form, then the form is no longer available because either the form has been deactivated, a limit (expiration date, response limit) has been reached or the starting date has not yet taken effect.
- Place the mousepointer over the dot to see more information.
Selecting forms
Single form: If you want to select a single form then just click anywhere on the line.
Multiple forms: in some cases you may want to select more than one form to:
- Delete forms
- Copy forms
- Label forms
- Deactivate forms
You can select multiple forms by:
- Clicking on the forms - tick the selection boxes or use the CTRL-button to select multiple forms.
- Selecting all forms - tick the selection box in the grey toolbar on top of the list (usually followed by a search).
- Selecting a group of adjoined forms – hold the SHIFT-button and click on the first and last form of your selection.
Sorting
In the drop-down menu on top of the list of forms you can choose how to sort the list. The drop-down menu next to it can be used to choose the sorting direction.
You can also sort with a single mouseclick by placing your mouse over the info you want to sort on of any form. The sort arrows will then appear.
Recycle bin
If you have deleted a form by accident then you can restore it from the recycle bin. The recycle bin contains all forms that have been removed in the last 30 days. To view the recycle bin just tick the selection box 'recycle bin’ in the toolbar. The result entries which were present at time of removal of the form will also be restored. 30 days after deletion the forms will be physically removed. |
|
|
Search forms |
|
Use one or several keywords to quickly find a form. Formdesk will search for the keyword(s) within the forms. Place several keywords within quotation marks to do an exact search. |
|
|
 |
|
|
Use the down arrow to view advanced search functions. You can indicate a search within specific parts. A search for merely the ‘Name & Title’ will provide results instantly. For a search within other parts, Formdesk will start the search after you have hit enter or clicked the magnifying glass. You can also filter on active forms (forms which are available) and, if there are several form owners, on the owner of the form.
Click the X to clear the search box.
If a label has been selected then Formdesk will search within the forms which are linked to that label. |
|
|
Categorise your forms using labels |
|
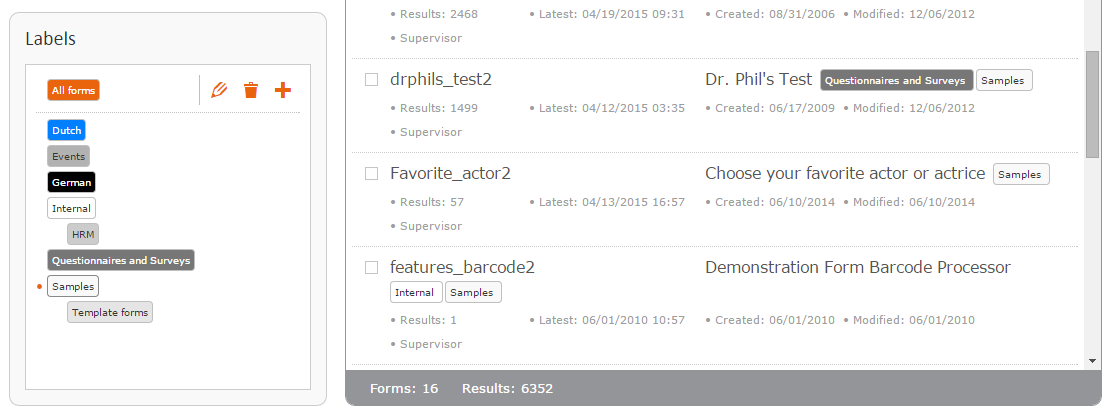
Formdesk offers the option to categorize your forms using labels. You can link multiple labels to forms. A label is linked to a form, which is different to folders that would physically contain forms. |
|
|
 |
|
|
There are 2 different type of labels: labels and sublabels. A sublabel is attached to another label. A sublabel can also be attached to another sublabel. When selecting a label with sublabel(s), only those forms are shown which are linked to the selected label, and not the forms linked to its sublabels.
Creating and managing labels:
Create a label by selecting the label ‘All forms’ and clicking on the +. Create a sublabel by selecting a previously created label and clicking on the +, or richtclick the label and choose ‘New label’ in the menu. You may choose a color for the new label, this is purely optical and therefore has no function.
To change the name or color of a label select the label and click on the pencil icon. To remove a label click on the 'trash bin' icon. Or you can rightclick the label and choose 'Edit label' or 'Remove label' in the menu. A label can not be removed if any forms are still linked to it or a sublabel is attached to it.
 A user can only create, remove or edit labels when the user has been given the explicit permission to manage labels. A user can only create, remove or edit labels when the user has been given the explicit permission to manage labels.
Linking and unlinking labels :
To link a label to a form:
- Drag the label and drop it on the form.
- Drag the (selection of) form(s) and drop it on the label.
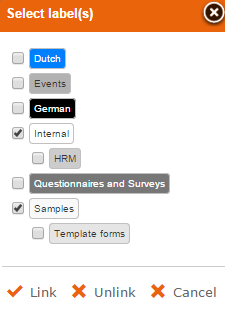
- Select one or multiple forms, right click and choose ‘Label’, or select the option within the toolbar.
To unlink a label:
- Place your mouse above the linked form after which a cross will be shown to unlink the form.
- Select one or multiple forms and choose ‘Label’ using the right click menu or from the toolbar.
|
 |
|
|
 A user can only (un)link labels to forms for which they are the owner. This permission is separate from the right to manage labels (add, edit or remove) which is an explicit user permission. A user can only (un)link labels to forms for which they are the owner. This permission is separate from the right to manage labels (add, edit or remove) which is an explicit user permission.
 If you want a form created by a particular user to have certain label by default, you can create an (empty) form to which you link the label and set it as the template form for that user. If you want a form created by a particular user to have certain label by default, you can create an (empty) form to which you link the label and set it as the template form for that user.
 HINT: If you would like to link a group of forms to a new label then in most cases it is possible to use the search function to select these forms (see the List of forms) and drag them to the label. HINT: If you would like to link a group of forms to a new label then in most cases it is possible to use the search function to select these forms (see the List of forms) and drag them to the label. |
|
|
The Footer |
 |
The footer contains these buttons:
 New form: New form:
This button is only visible when you have been given the specific user right to create forms. A completely empty and layout-free form is created without any settings, except for a standard e-mail notification unless another form is used as basis. This is possible in these cases:
- Copy form: If you want to use another form as basis for a new form then you can copy the original form and afterwards edit the copy.
- Copy layout: use the layout of another form by first creating a new form and then on the Layout tab of the form select a different form from which to copy the layout.
- Template form: A template form can be set on account level or on user level by the supervisor or the owner of the form. This form will then be used as basis when creating a new form. More information can be found in our blog.
 Usage statistics: Usage statistics:
An current and historical overview of the usage on your forms is shown. You can view how many times your forms are requested, submitted, how many entries are stored and how much file upload space is used. It is also possible to view the data of a certain label, sub user or form.
 User management: User management:
This button is only visible for the supervisor. Within this overview sub users can be created and managed. See the manual for more information.
 Search on Entry Id / Order No. : Search on Entry Id / Order No. :
Here you can search on the entry id or order number of submitted forms. See the manual for more information.
|
|
|
Documenting |
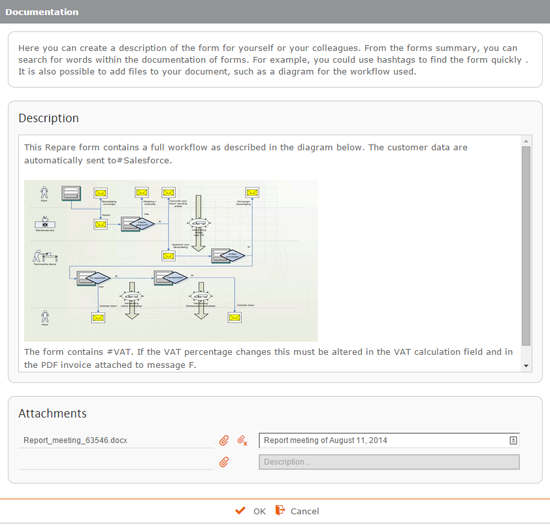
There can be many reasons for documenting certain information or instructions for a form. For example to find specific data on a form that changes each year and needs to be modified. Or the diagram of a workflow you created which can then be viewed by a colleague when changes must be made. But it is also possible to include hashtags enabling you to easily find forms using the search function, in cases you don't want to create a label for those forms.
For such purposes we offer the option to include certain text information or attachments.
 Users can only add documentation for forms they are permitted to edit. To view documentation just any permission to the form is required. Users can only add documentation for forms they are permitted to edit. To view documentation just any permission to the form is required. |
|
|
 |
|
|
|
|
|
|
|