|
|
|
|
|
|
|
|
Form editor / Tab sheet Questions |
|
|
|
|
A form consists of items. These can be various kinds of questions, but also static items such as a piece of text or a line.
This document provides help when you build your form with items. You do this on the tab sheet Questions which is available when you create a new form or edit an existing form.
The form editor works in accordance with the so-called 'What You See Is What You Get' (WYSIWYG) principle. This means that as you build the form, you can see immediately what it will look like for the user. |
 |
|
|
This document discusses the following topics:
|
|
|
|
Adding / Editing items |
Adding / inserting an item:
If you wish to add an item to this form, click on the "Add item" button at the bottom of the form. If you wish to insert an item between 2 items, right-click on the item to which you wish to add the new item and select one of the options for adding a new item from the menu.
A new window is then displayed in which you must select a type of item.
Editing an item:
If you wish to edit an existing item, double-click on the item concerned or right-click on the item and select the "Edit item" option from the menu.
Laying out an item:
When adding or editing an item you may determine the layout of this item. You should do this only for the items where the layout has to differ from the general layout! The general layout is determined on the "Layout" tab sheet. |
|
|
|
|
Selecting items |
|
If you wish to perform an action on one or several items, you must select these items first. Next you right-click on the item to select an action from the menu or you select the desired action from the tool bar located at the top of the screen.
You can select a single item by simply clicking it with the left mouse button.
To select several items, the following possibilities are available to you:
- Keep the left mouse button depressed and drag the mouse over the items which you wish to select
- Select the first item which you wish to select and select the last item while keeping the SHIFT key depressed
- You can select several, possibly non-consecutive, items one by one while keeping the CONTROL key depressed. |
|
|
|
|
Copying / Moving items |
|
To copy or move one or several items, you must select these items and select "Copy item(s)" or "Cut item(s)" from the right mouse button menu or from the menu bar.
Next you select the item before which you wish to insert the copied or cut item and select "Paste item(s)" from the right mouse button menu or from the menu bar. If you wish to paste the item at the bottom of the form, you must use the "Paste (bottom)" button. |
|
|
|
|
Copying properties |
|
Copy a dependency to a group of items. Or create a form on which each question needs an answer required. Such operations can be done very easily by copying properties. This can be done as follows:
1. Copy the item which contains the desired properties
2. Select the item(s) which should adopt the new properties
3. Right click the item(s) and choose ‘Paste properties…’
4. Select the specific properties that you want to paste and click OK
Note that the current properties will be overwritten. This cannot be undone! |
|
|
|
|
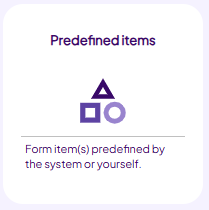
Predefined items |
Predefined items consist of one or several stored standard items. You may use these to create your forms in a faster and simpler way. The system offers a number of predefined standard items but you can also create your own items.
Creating predefined items:
Select the item or items which you wish to store as a predefined item. Next select "Create predefined item" from the right mouse button menu or from the button bar.
Inserting predefined items:
Add an item to your form. Select "Predefined item" as type of item. Next select the desired predefined item and click OK. |
|
|
 |
|
|
Aligning items |
Formdesk will automatically align all items with one another. However, you can influence the alignment and the positioning.
Grid lines:
A Formdesk form consists of a table with cells into which the components of the items are placed. You can make this visible by switching on the grid lines using the button on the button bar. In this way it often becomes visible immediately why Formdesk uses a certain alignment.
Alignment sections: |
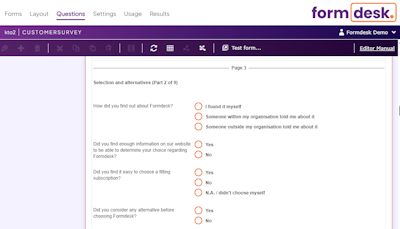
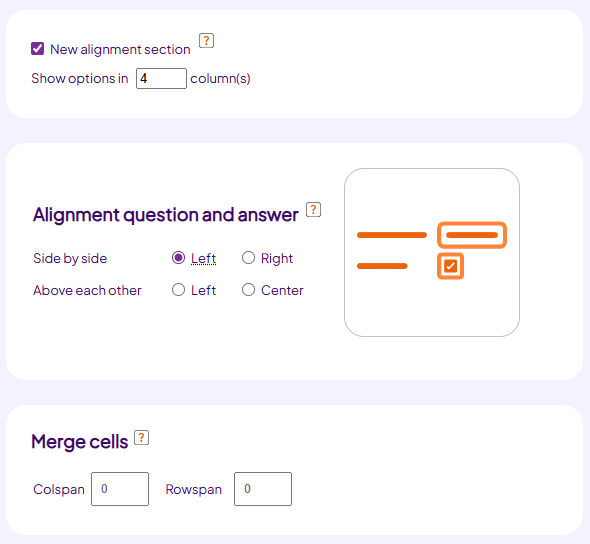
By default Formdesk neatly aligns all items of the form / the page with one another. However, if you want a certain item no longer to align with the items above it, you can indicate that this item must start a new alignment section. You can do this by editing the item and ticking the "New alignment section" option on the "Layout" section. Formdesk will then create a new table starting at this item.
In the example given below a new alignment section is started at the question "Your latest holiday destination" so that the answer fields of the last two questions are not positioned straight under the first two questions. |
|
|
 |
|
|
|
|
|
|
|
|
Positioning items next to one another: |
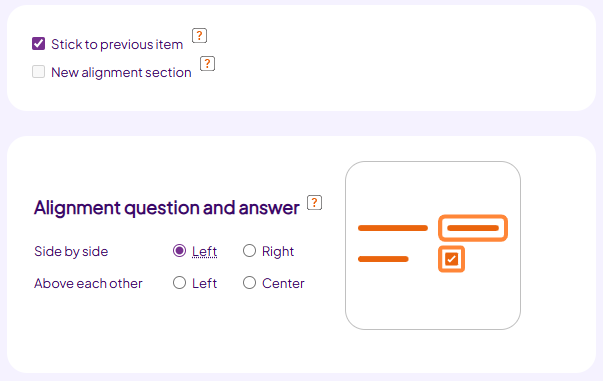
You can position several items on the same line by selecting "Add item before this item" or "Add item after this item" in the right mouse button menu of this item.
As you can see in the example below, the items are aligned automatically with one another. For the question asking for the city, however, we have opted for letting it follow immediately behind the field for the ZIP code and therefore it does not align with the question for the street and house number. We have done this by editing the "Town" question and by ticking the "Immediately behind the previous item" option on the "Layout" section .
|
|
|
 |
|
|
|
|
|
Titles column:
If you position questions next to one another, you may want to give a title to the columns created in this way.
For columns like this you use a "Text" type item.
The following is an example of an order list consisting of 7 columns which becomes apparent immediately when you switch on the grid lines. The first column contains items of the "Text" type. The other 6 columns consist of 3 questions (a calculation is considered to be a question) which each use a column for the question and for the answer part.
If we were to place the "Price" title behind "Article", then it would not be positioned over the "Price" field, but over the Euro sign. To prevent this, you must insert a "Blank space" item between the "Article" and "Price" titles. In this example we have placed an "x" in the positions where there should be a blank space, in order to show you the positions of the blank spaces. |
|
|
|
Using fixed width:
By default the width of the form, the page or the alignment section is determined automatically by the longest item. However, you may wish to deviate from this width, for example because you want to give the same width to the various alignment sections. You can do this by using the blank space item. You can give this item a fixed width. If this fixed width is greater than the longest item, then the width will be determined by the blank space item. The blank space has now become the longest item. Specify that the blank space must be transparent and 1 pixel high so that it is invisible to your users.
Merging cells (advanced): |
|
|
As explained above, a Formdesk form consists of a table with cells into which the (components of) items have been placed. If you position items next to one another, it may sometimes be useful to merge cells. When editing an item, you may specify a "Colspan" or a "Rowspan" on the "Extra" section. At Colspan you may specify the number of columns to be spanned by the cell into which the item has been placed. At Rowspan you may specify the number of rows to be spanned by the cell into which the item has been placed. From a technical point of view, Formdesk uses the HTML parameters Colspan and Rowspan from the HTML table for this purpose.
In the example below, to the left of the calculation for the total amount, there is a single blank space which spans 5 columns; the Colspan of the blank space has therefore been set to 5. If we had not used Colspan, then we would have had to insert 5 blank spaces.
To the left of the order list you can see a picture. We have given this picture a row span of 4, so that it spans the 4 lines of the order list.
Formdesk will always span the last item of a line over the remaining columns automatically, therefore is was not necessary to specify a colspan for the horizontal line in the example below. |
|
|
 |
|
|
|
|
|
|
|
|
|
Including HTML / Javascript |
|
If you are familiar with HTML and/or Javascript, then you can use this in your form, for example to insert a hyperlink or the tracking code of a website statistics provider such as Google Analytics.
To include HTML code in your form, you add an item of the "Text" type and tick the "HTML code" box. You must place Javascript between HTML |
|